
< Previously: "Learn To Love the Pen Tool, Part 1
Vector Drawing From A Sketch
In this demonstration, we'll look at how I trace a sketch with paths using the Pen Tool in Illustrator. I'll show you some typical tools and tricks that I use to quickly lay in simple vector lines using an imported drawing as a guide. When it's completed, you should have something that looks a bit like a coloring book page, with even stroke widths and clean lines. I've also included a speed-though video of me working on this drawing and commenting on how I put it together.
If you like these kinds of demonstrations and want to see more, please consider contributing to my Patreon campaign. Patrons get special perks like buttons and other items, and in addition to the money contributed, it's a huge vote of confidence that this sort of sharing is important and worth doing. Anyway, thanks for following along. Let's get to it.
Bringing in the Sketch
For me, it's much easier to have a sketch to draw from when drawing with the Pen Tool in Illustrator. I always like starting with pencil on paper, but sometimes I use a sketch from a naturalistic sketching program like Sketchbook Pro. Whether you sketch with the computer or on paper, you're going to need to get that doodle into Illustrator. There are a few different ways to do this. Here are my favorite methods, in order of preference.
Copy/Paste

I like to work fast and with as few steps as possible, so I'm a big fan of copying screen-captures to the clipboard and pasting them into Illustrator. That way, I don't have to import, open, or place a save file. It's just copy and paste. There are lots of free screen capture apps, but on a Mac, my go-to shortcut is Shift+Ctrl+Cmd+4. That brings up crosshairs, that you drag across an area of the screen. When you hear a camera sound, that means the area of the screen is copied to your clipboard and ready to paste (Cmd+V) into Illustrator.
You can also just copy/paste from the web, Photoshop, or almost anywhere that you can copy an image file to the clipboard.
Doing a screen-capture from Sketchbook Pro
Open
JPG, PSD, TIFF, and other file formats can be opened directly in Illustrator as well. In this case, like to paste them into new documents, but that's entirely optional. Image sizes can get predictable with this method. Sometimes an image might open too large for the Illustrator document size and could require some wrangling.
Place
Under the File menu, there is the option to Place a file inside of your Illustrator file. When an images is "placed", there is a link created between the image and where it is placed in Illustrator. That means that you can open the source file in Photoshop and make changes. When you switch back to Illustrator, a dialog message with open up letting you know that the file has been updated. It will ask you if you want the placed image updated. This is handy if you want to make changes to a sketch in Photoshop but don't want to disturb the Illustrator file.
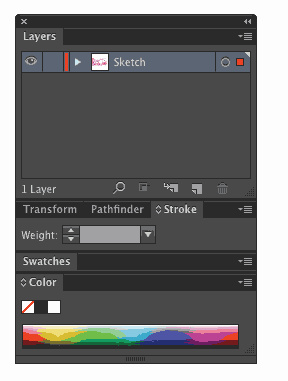
The Layers Panel
If you double-click a layer, the Layer Options dialog pops up. From here, you can adjust color of the paths ( I like Orange best. Why is there a Yellow? It's so annoying.). There are also a series of checkboxes. If you choose "Dim Images to:", the greyed-out default value of 50% becomes editable. 50% is a good number for light sketches and if check this box on the layer that your sketch lives on, the sketch will "dim" 50%. This makes it much easier to see your Pen Tool vector paths during tracing.

There is also the option to "Lock" the layer. This has the same effect as clicking the lock icon next to the eye icon in the Layers Panel. To help trace the sketch without accidentally moving it, I recommend "locking" the Sketch layer and creating a new layer called "Lines" above the "Sketch" layer.
Now, you're ready to start tracing your sketch using the Pen Tool fundamentals that you learned in Part 1.
Navigating the Artboard
In putting together this walkthrough, I'm realizing how much about learning to love the Pen Tool has little to do with the actual Pen Tool. A lot of drawing with the Pen Tool involves navigating the artboard. When I draw on paper, I'm always turning the paper and moving it to fit the spot that I want to draw on. I don't leave the paper still as though it were taped down to the table. It's the same with Illustrator. While you're drawing, you should be moving the screen around to fit to where you want to be drawing, and you can do that. Below are some options for keeping the artboard right where you want it.

Panning Around with the Hand Tool
While I have the Pen Tool selected, I've always got my left hand on the keyboard. That way, my thumb is always near the Space Bar which happens to be the shortcut for the Hand Tool. The Hand Tool also exists in the tool palette but if you use the shortcut, it will snap back to the selected tool (namely, the Pen Tool) when you let go of the Space Bar. With the Hand Tool, you can move the whole artboard to a more comfortable position, in the same way that you might move a piece of paper under your hand while drawing.
Zooming In and Out
Illustrator lets you zoom in really far. It's handy for adjusting something just right. Zoom is represented by the magnifying glass in the tool palette, but I use Cmd+ and Cmd- most of the time for shortcuts. That way, it snaps back to your previously selected tool so that drawing can continue without a trip back to the tool palette.
Setting the artboard
Setting the Artboard
When you create a new document, Illustrator has some default document sizes. You might want to fit the document size to match your drawing. This is done with the Artboard Tool in the tool palette. Once the artboard is set, Illustrator has a better idea of how best to help navigate the drawing. I recommend it.
Command 0
If I've been drawing up close on an image for a while, I like to zoom out to see the progress. Instead of zooming out with the magnifying glass or using Cmd-, it's easy to see the whole document by using Cmd+0. This will zoom the artboard out to its edges. I do this about a billion times while drawing to keep track of my progress.
The Navigator Panel
I don't use it that often, but if you have a complex drawing (like a map, maybe) you can use the Navigator Panel to quickly drag and zoom to different areas of the artboard. That panel can be found at Window>Navigator.
Drawing
Cmd+Z Undo
Another reason that I keep my left hand on the keyboard is to keep close to Cmd+Z or "Undo" as we all know it. Undo is your friend. Luckily, Illustrator gives us lots and lots of undos, just in case we need them.
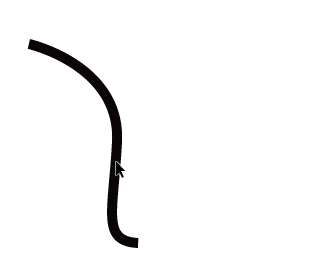
Adding and Deleting Points

Adding a point to a curved path
Sometimes I want to add a new point to a line that I've already made. This is really common when adding detail into a piece or fixing a curve. In the previous post, we looked at the Pen Tool's fly-out menu. In those options, there are pen icons with + and - symbols. Those allow us to add or take away points on paths. The shortcuts are "+" and "-" while the Pen Tool is selected. "P" gets you back the regular Pen Tool. Most commonly, you'll want to use the white arrow (Direct Selection Tool "a") after adding a point to manipulate it.
Addling Handles to Curves

Adding a handle to a path
In that same Pen Tool fly-out menu, there's a tool at the bottom called the Anchor Point Tool. This tool allows you to add handles to points. This allows for more manipulation of curves. The Anchor Point Tool can also add handles to points that don't have handles, like right-angles. This will convert an angle into a curve immediately. Some people even like to trace sketches with just angles and add curves later with the Anchor Point Tool. I've never gotten used to that method, but it's nice to know that Illustrator is flexible enough to allow that option.
Duplicating Lines
Duplicating a path with Option/Drag
Sometimes it's helpful to create an exact copy of a line or object. You could copy and paste it, but an even quicker method is to duplicate it. To easily duplicate something, click it and hold down Option while dragging it. If you hold Shift while doing this, it will constrain to the X or Y axis. If multiple items are selected and you try this, it will duplicated everything selected. It's a great way to quickly make lots of something.

Eyedropper Tool
Instead of manipulating the line-weight of a path with the Stroke or Appearance panels, I often use the Eyedropper Tool to grab the attributes from a nearby line. This allows me to quickly continue drawing without having to deal with more panels. The Eyedropper will also grab an object's color and effects in addition to line weight. The shortcut for the Eyedropper is "I".
Notes on Drawing
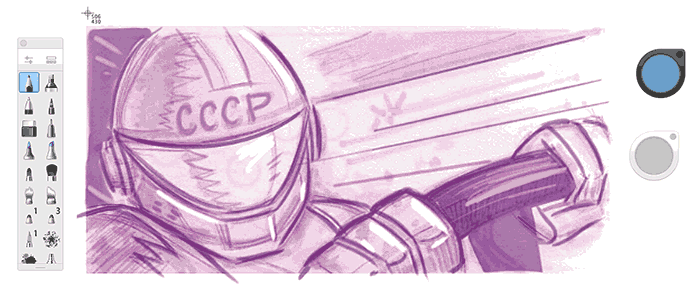
Here, you can see a basic tracing of the sketch. In my Layers Panel on the right, I have a "Sketch" layer, a "lines" layer, and a "border" layer. The border layer sits on top and just gives me a boundary to work in. The lines layer is where all of the line work lives. I usually "lock" the other layers so that I don't accidentally move them. To do this, activate the "lock" icons by clicking in the area next to the eye icon in the Layers Panel. When making paths, I usually like to work from big to small, focussing on the large items of interest first, and then gradually working down to more detailed areas. If I'm working something in just black and white like this, I might pay close attention to line weights. I usually make the main object of interest a little thicker, at least in the overall silhouette. Interior lines are a little thinner. In the end, you should get something that looks similar to a coloring book page.

Next Time
In the next installment of "Learn To Love the Pen Tool", we'll look at different ways to add weight and variety to lines. I'll take a stroll through the Brushes panel, Stroke Options, and Outline Stroke. I hope you like this series so far. If you want to support my efforts, head over to my Patreon campaign and consider donating at any level. There are perks, some of which might help you learn even more Pen Tool magic.